Friday, October 7, 2016

Vegan Laing with Kale ~ Axille's Vegan Corner

When I was a kid, I use to visit my grandfather (lolo) and grandmother (lola) in the province during summer vacation. In one of the bedrooms of their home, sometimes I would see these huge leaves that resembles a water lily leaf hanging on a clothes line. And at the time I use to think they were just wall decorations of some sort. But other than the wall decorations, I also thought he was hanging it dry to make fans out of it...you know like those folding hand paper fans :). What can I say, I'm just one of those kids that has creative imaginations ;). Then I also remembered that he would cook this really yummy dish called Laing accompanied with rice. Just recently, I recalled those memories then I put 2 and 2 together. I never knew that it was the same leaf that he would use to cook Laing until my sister-in-law's mother cooked one and it brought back memories of my grandfather, and I knew I have to learn how to make it.

My grandfather was from Bicol and I think it is one of the dishes that Bicol is known for so it was one of his specialty.  Laing is mainly made of dried Taro leaves, coconut milk and red hot chilies.

Dried taro leaves can be bought from oriental supermarkets and some online. I've tried it before and unfortunately it doesn't seem to taste like the ones my grandfather makes or the ones they serve in the restaurant maybe because of the way they were processed. I'm guessing like my grandfather use to do, is to get it fresh and hang them dry for a few days before cooking which gives it's distinct flavor. But then again, who would have the time or the resources to do that.

Since this ingredient is rare to find in a regular supermarket and I can't possibly purchase them online every time I have a craving, I had to improvise and find a substitute. The ones that came close to it's texture are collard greens and kale, either curly leaf or lacinato. However, the lacinato kale came close to how it taste but with a combination of other ingredients. So after several experiments, here's my vegan concoction. It's vegan because it doesn't have any meat and also it's low in calorie because I'm only using 1 can of coconut milk instead of 2 or more which is usually called for in this recipe. I think it's the closest to how my grandfather use to make it. Even though its not the same, at least it's satisfyingly good.

Laing (vegan)


Ingredients:

1 tbsp oil
1 medium onion, chopped
3-5 cloves garlic, minced or grated
2 tbsp ginger, grated
1 fresno & 1 serrano pepper, sliced (add 1 more serrano pepper to make it hot)
16 oz. crimini or small portobello mushrooms, chopped
1 to 1 1/2 cups vegetable broth
3-4 stringed or bunches lacinato or dinosaur kale, stem removed and cut bite size pieces
1 13.5oz coconut milk
2-4 tbsp white distilled vinegar, to taste
1 tsp garlic powder
1 tsp onion powder
salt and pepper to taste

 
Directions:
  1. In a large pot, heat the oil and sauté the onions, garlic, ginger, peppers and mushroom, cook it for about 5 minutes or until the mushroom start sweating. Then add the kale and 1 1/2 cups of vegetable broth. Cover with a lid and simmer for about 20 to 30 minutes, occasionally stirring and cook till the kale is al dente.
  2. Mix in the coconut milk, vinegar, garlic powder, onion powder, salt & pepper, and give it a good stir. Cook for another 10 minutes or until the kale is completely cooked to your liking and the coconut milk has reduced and thickened. Serve hot with rice and enjoy.
Number of Servings: 8-10

Click below to view the YouTube video


Tuesday, September 27, 2016

Vegan Banana Muffin ~ Axille's Vegan Corner

This Banana Muffin recipe is not just super easy to make but it's super moist. It's cholesterol free and low calorie too.


Banana Muffin

Serves 12 muffins

Ingredients:
4 large or 5 medium ripe bananas
1 cup raw sugar
1/4 cups vegan butter, softened
1 tsp vanilla extract
2 cups unbleached all purpose flour
1 tsp baking soda
1 tsp baking powder
1 tsp salt

Directions:
  1. In a medium size bowl mash the bananas then add sugar, butter and vanilla. In another bowl mix together the flour, baking soda, baking powder and salt. Fold in the banana mixture into the dry ingredients gradually until all are completely mixed.
  2. Preheat the oven at 350 degrees. Line the muffins pans with muffin cups and use an ice cream scoop to place the batter into each cup.
  3. Put the pan in the oven and bake for 10 minutes then turn the pan around and bake it for another 8-10 minutes or until toothpick inserted in the middle comes out clean. Let it cool for 10-15 minutes on a cooling rack before serving.


Click on the video below

Saturday, September 24, 2016

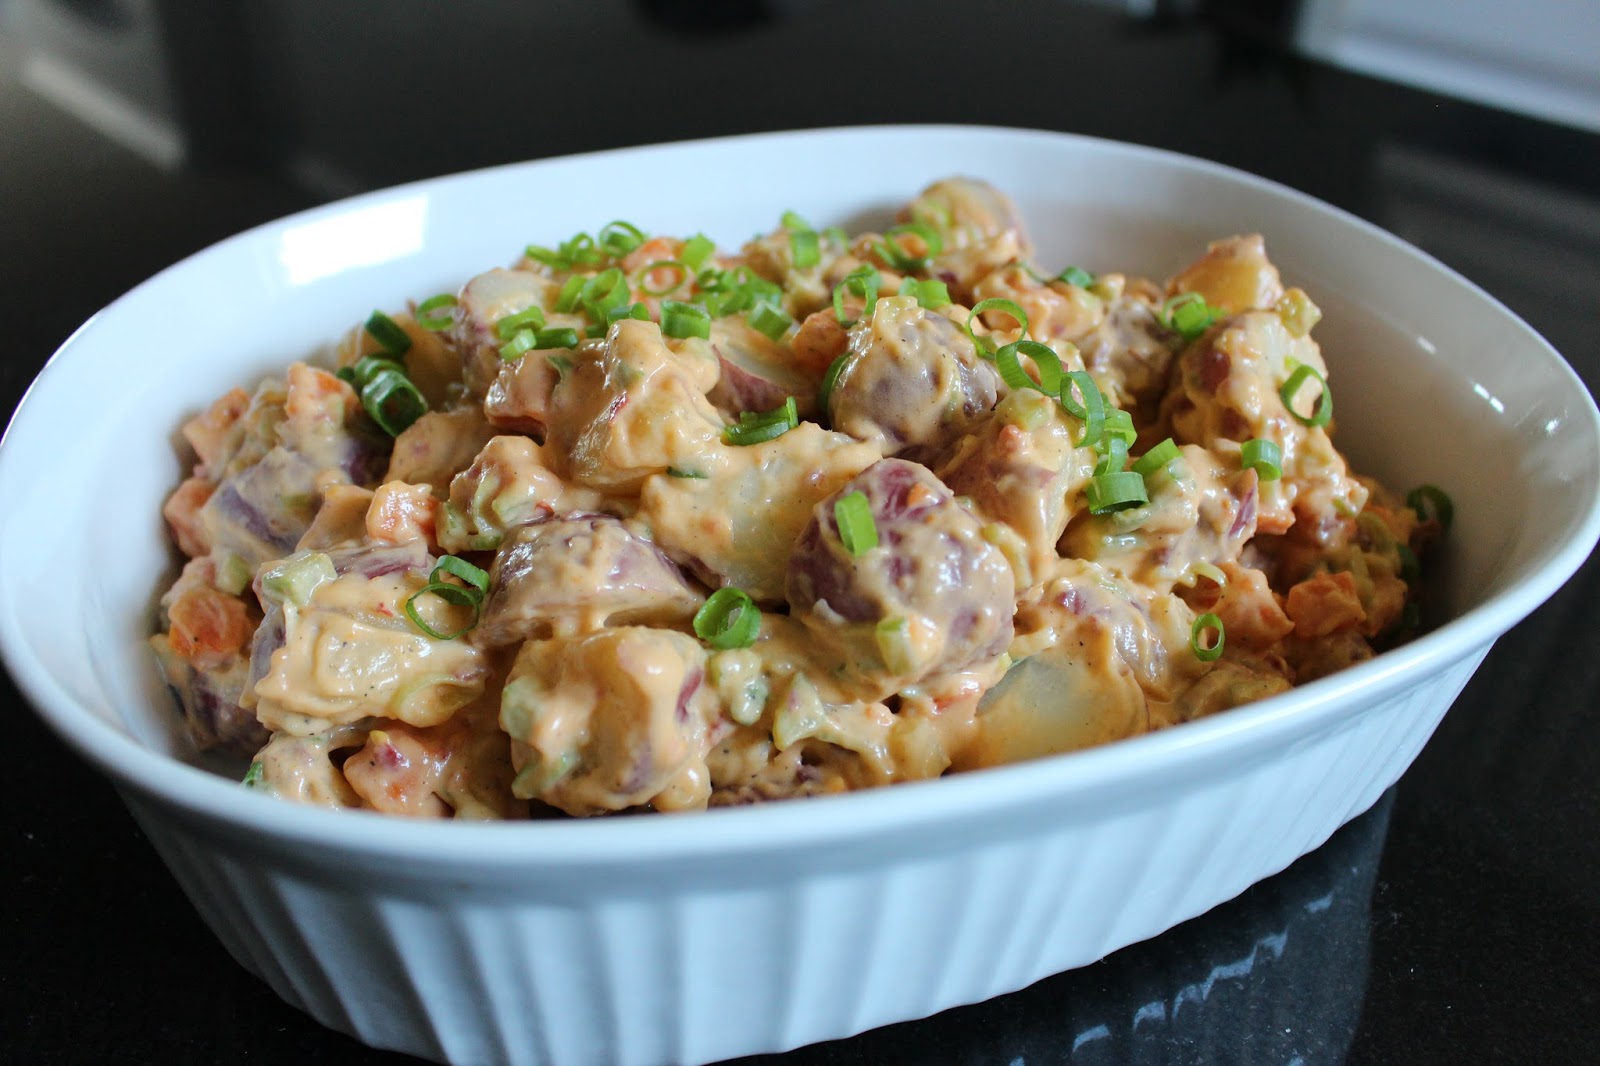
Vegan Spicy Asian Potato Salad ~ Axille's Vegan Corner

This recipe came to me after eating some mashed potatoes and I wanted to make it a little spicy. We were out of Sriracha but I found another spicy condiment in our refrigerator that I got from the Asian supermarket. I starting adding this ingredient to some of the dishes I cook or a condiment to any food I eat. It has a different kind of taste that was distinct from the other spices I've used before and I was hooked.  Since then it has been my go to ingredient for when I want to add some kick to my dish. This ingredient has inspired me to create my version of the Potato Salad and the star ingredient is "Sambal Oelek" which is a fresh ground chili paste or hot sauce. It is used in many Asian cuisine as a spice or as an accompaniment to any dish to give it some heat.


Spicy Asian Potato Salad

Ingredients:
3 lbs baby red potatoes, scrubbed
3 medium carrots, diced
2 stalks celery, diced
2 stalks scallions, chopped
1 cup mayo, vegan or dairy free
1 - 2 tbsp Sambal Oelek (chili paste), to taste
2 tbsp lemon juice
1/2 tsp garlic powder
1/2 tsp onion powder
salt & pepper to taste

DIRECTIONS:
  1. Place the potato and carrots (sliced in half) in a pot of water.  Bring it to a boil then simmer it with the lid on. Cook for 5 to 10 minutes or until tender. Drain the water and let it cool. Peel the skin off the carrots and dice it. Leave the potato skin on and cut it into quarters, halves or bite size pieces depending on the size of the potato. TIP: Place the large pieces of the potato in the bottom of the pot, medium in the middle and smallest on the top. Place the carrots on the very top of the potato when cooking it all together.
  2. In a large bowl, mix the potato, carrots, celery, scallions, mayo, sambal oelek, lemon juice, garlic powder, onion powder, salt & pepper to taste. Carefully mix all the ingredients together until everything is well combined. Chill for 1 to 2 hours before serving.


Wednesday, February 26, 2014

Homemade Peanut Butter ~ Axille's Vegan Corner

Back in the Philippines, there's a brand of peanut butter that my mom use to buy which is Lily's peanut butter. I would spread that over a freshly baked Pandesal (bread roll), have it for dessert or snack and that was enough for me to satisfy my sweet tooth.  Even after so many years here in the States, I would still crave for that sweet, smooth and yummy peanut butter.

Then one day, I finally found an asian store that sells this brand.  But to my surprise, I was shocked to see the amount of oil it has because you can easily see the separation of oil and peanut butter. In spite of the volume of oil, I still went ahead and bought one because I thought it was worth it. However, I was horrified to taste the staleness of my once beloved peanut butter spread.  I was so disappointed and then I thought, how long has that jar of peanut butter been sitting on the shelf. So lesson learned, always check for the expiration date and if you ever see some oil stained on the label that's a good indication that it's not tightly sealed which means the food goes bad in a short amount of time. So now, I've succumb to buying Jif or Skippy and it has to be honey roasted because it's the closest to my favorite peanut butter.

When my husband and I became vegans, we were more conscious about processed foods. So we started reading labels and researching words we've never heard before. Lately, I've been making everything from scratch including peanut butter. I can't believe how easy it is to make one. So here it is folks, my own version of Lily's peanut butter. My food processor is about a gazillion years old so if you have the high end, it'll probably be way smoother than mine.  Also a word of caution, do not increase the amount of oil. After it's been blended, a tablespoon per cup of roasted peanut is all you need. So go ahead and try, let me know what you think.

Homemade Peanut Butter

Servings 1 cup

Ingredients:
1 cup roasted peanuts
1 tbsp vegetable oil
1 tbsp agave nectar syrup
1/2 tsp fine sea salt

Directions:


  1. Remove the lid and place the peanuts in a food processor and grind until it resembles a coarse meal.
  2. Then remove the top cover or mouth cover of the lid and slowly drizzle the oil while the food processor is running. Wait until you see some consistency.
  3. Take the lid off and add the agave syrup and salt, blend for another 2 to 3 minutes or until it looks smooth.
Place the peanut butter in an airtight container like a mason jar and store it in the refrigerator. Good for almost 2 months or while it last.


Click on the link below:

Sunday, February 23, 2014

Pandesal (Bread Rolls) ~ Axille's Vegan Corner

Pandesal is a bread roll that's a breakfast staple in the Philippines and it is usually eaten with butter, peanut butter, coco jam, grape jelly, cheddar cheese or a savory spread of liver pate.  In unusual cases like mine when none of these are available, I like to eat it with sugar and sometimes condensed milk...yes, sugar and condensed milk, even dipping it in evaporated milk with sugar hits the spot!  Gross!!! you might say??? I think not! Try it and you'll be the judge, but make sure to warm up the bread or my answer will be "I concur"...with the gross part I mean.  It is accompanied with coffee in which you dunk it into the coffee, if it's eaten plainly of course. 

When I use to live in the Philippines as a little girl, I remember every Saturday or Sunday morning, my mom would tell me to go to the corner bakery store and buy a fresh batch of these yummy breads. Even if there's a long line, I would just stand there and savor the sweet aroma of bread as they were being baked. During the cold season, the warmth of the bread which is usually packaged in a brown paper bag helps my chilled hands toasty as I walk home and all I would think about is getting home as fast as I could so I can chow down with a hot cup of chocolate milk (Milo). Unfortunately, I would have to share it with my 4 other siblings and 2 cats...that's life for you in the Philippines. :-(

So finally, here's my version of what I think is the closest version of the ones they make back home. Since they were a nickel or dime a piece (in pesos currency, not that that they really cost a nickel or a dime but just a figure or speech) the ingredients are what I think they would commonly use and after making these bad boys for so long, I have tweaked and tried some recipes to get it the right taste and texture. I'll have different variations of breads in my future blogs and videos so please stay tuned. By the way, these are cholesterol free and low in calories if you're figure concious. They are fluffy, soft and very moist. Make sure to keep it in an air tight plastic bag to keep it from drying after it has cooled for at least an hour. Otherwise, you wouldn't want to be eating a soggy pandesal now...would you?!?

Please try my recipe and send me your questions or comments below.

Pandesal or Bread Rolls

Servings: 16
Calories per Serving: 143

Ingredients:
1/2 warm water (110-115 degrees Fahrenheit)
1 packet or 2 1/4 tsp active dry yeast
3 cups plus 3 tbsp unbleached bread flour or all purpose flour
1/2 cups plus 1 tbsp pure cane sugar or plain sugar
1 tsp fine sea salt or regular salt
1/4 warm water (2nd cup)
1/4 cup vegetable oil or canola oil


  1. Dissolve the yeast in warm water (between 110-115 degrees Fahrenheit)Add sugar and stir, make sure that the yeast is well dissolved. Place it in a warm area of the kitchen.
  2. In a large bowl, mix the flour, sugar and salt then give it a good stir with a wire whisk or a spatula.
  3. Mix the vegetable oil into the second cup of warm water, stir and set it aside.
  4. After the yeast had been activated and foamy, mix and fold it into the flour. Add the water and oil mixture next but in 2 to 3 batches so it will incorporate evenly into the flour mixture. Once the flour starts to stick together, start kneading (I prefer kneading it in the same bowl but you can use a cutting board or a kneading board) Knead the dough for about 5 to 8 minutes until the dough is somewhat smooth. ***TIP: if dough is too sticky, dust it with a tablespoon of flour at a time. I would recommend no more than 2 tbsp as this may make the bread dry and tough. If the dough is too dry, add a tablespoon of warm water and the same rule as the flour applies.***
  5. Once the dough becomes slightly smooth and elastic, place it in the same bowl and cover it with a plastic wrap, an extra cover and towel will help the dough to rise. (Brushing the the bowl with oil will keep the dough from sticking but not really necessary, using a spatula will also help with scrapping it off the bowl). Let the dough rise for a 1 to 2 hours or until it doubles its size. ***TIP: make sure to place it in a warm area.*** 
  6. After the dough had risen, place it on a cutting board or a clean surface and divide it into 16 pieces.  Divide the dough in halves to have even size portions.  After dividing, take one of the dough and start pinching the opposite ends of the dough together, do a half turn and pinch the ends again. This will help smooth out the uneven sides and helps form it into a ball. You may leave it the way it is or knead the dough with the heel of your palm into a circular motion while cupping to control the dough, this will form the dough into a smooth and firm or tight ball.
  7. Place the dough balls into a baking sheet lined up with parchment paper. This will help the bottom side of the dough from sticking and burning. You may use bread crumbs or corn meal to dredge the dough to have the traditional effect (I prefer to eliminate it completely because it is not necessary if the only purpose is to keep it from sticking on the baking tray and for less cleaning).
  8. Put a plastic wrap gently over the dough then cover it with a kitchen towel to help the dough rise. Let it rise for 1 to 2 hours until it doubles its size. ***TIP: This is the most important part of the proofing process so make sure it rises and doubles its size, otherwise, your bread will not be as fluffy and airy. Check the dough after 1 hour, if it hasn't doubled its size, let it rise for another 30 minutes to an hour. Slow rise is very common during the cold season when there's not enough warm air and humidity in the room. Dough rises quickly and easily during the warm seasons, so factor in these types of conditions when making a bread.*** 
  9. Once the dough has risen, preheat the oven at 375 degrees. ***TIP: Only remove the towel and plastic wrap once the oven had been preheated, otherwise this might deflate the dough depending on the temperature of the room.***
  10. After the oven's temperature had reached to 375 degrees, place the baking sheet in the middle rack or center of then oven and bake it for 8 to 10 minutes. ***TIP: Depending on the quantity of the dough balls, if it was divided into 12 pieces or less then bake it for 10 to 12 minutes, if 16 pieces, then bake it for 8 to 10 minutes. Use a timer and set it at 8 minutes then keep watching till the bread starts to turn brown. It's better for the color to be light golden brown as this will continue baking even after removing from the oven.***
  11. Place it on a cooling rack and wait for 5 minutes before serving.  Serve it with your favor spread or eat it plainly and enjoy.

Click the link below to view the video:

Wednesday, February 5, 2014

How To Dry Roast Peanuts ~ Axille's Vegan Corner

Peanuts are one of my favorite snacks. I preferrably like the dry roasted unsalted kind. To my amazement, making it homemade was so easy. Why didn't I think of it?!? I have been buying the pre-made ones and who knows how long they've been sitting on the shelf. Not only that, did you know that once peanuts have been roasted and it releases it's oils, they tend to go rancid even if they are dry roasted. Making it on your own guarantees freshness and you know exactly what went into it.

And also, did you know that peanut is not a nut but its actually a legume and it's part of the bean family. Peanuts are a good source of fiber, protein, niacin, folate, magnesium, vitamin E, rich in monounsaturated fats and full of antioxidants. They're versatile and goes well with anything. There's so many desserts and dishes I could make using this and I'm so excited to show you how to bake dry roasted peanuts.

How to make Dry Roasted Peanuts

Ingredients:
2 cups raw peanuts
salt to taste

Kitchen must haves:
baking sheet
parchment paper

Directions:

  1. Pre-heat the oven to 325 degrees Farenheit.
  2. Line up the baking sheet with a parchment paper and make sure it fits with the length of the sheet. (Tip: To keep the parchment paper from rolling, fold it in quarters. You can leave it the way it is or fold the seams so that it fits the tray perfectly)
  3. Pour the raw peanuts on the baking sheet and spread them evenly.
  4. Place the baking sheet in the middle rack or center of  the oven and bake it for 18 to 20 minutes.
  5. In about 6 to 7 minutes into baking, take the baking sheet out and swirl the peanuts around, this will stop the peanuts from over browning on one side. Repeat the steps again after 6 to 7 minutes.
  6. After 18 minutes, check on the peanuts and see if they are light golden brown, keep in mind that they continue to cook even after removing them from the oven. And also, give it another swirl for good measure.
  7. Place it on a cooling rack and lightly season it with salt.
Nutritional Facts:
http://nutritiondata.self.com/facts/legumes-and-legume-products/4357/2

Click on the link or video below:
http://youtu.be/MPxXm4tEphc

Thursday, January 23, 2014

Kale Salad with Citrus Dressing ~ Axille's Vegan Corner

The first time I tried kale it completely turned me off because it was bitter and tough. I love bitter melon but I'm putting my foot down on this one. Then one day, my co-workers and I rode the train to the Phoenix airport and had lunch over at Chelsea's kitchen. They had this kale salad but it wasn't what I ordered because I didn't want to pay for a meal that I'm absolutely going to hate. However, my co-worker urged me to try her kale salad and perhaps I would order it the next time we dine there. When I tasted it, my eyes went wide open and I said...OH MY WORD!!! I didn't realize that kale could be sooo delicious. I mean, this was unbelieva-brah! Because of this salad, I was inspired to create my own version.

So, the next time you make a salad instead of using an iceburg or romaine lettuce, why not try kale. Did you know that kale is rich in vitamins A, C & K and it's only 34 calories per cup serving. My Kale salad with citrus avocado dressing is sweet, tangy and creamy. I urge you to try kale and I'll make a kale believer out of you.

Kale Salad with Citrus Avocado Dressing
2 - 3 Servings

Ingredients:
6 - 8 lacinato or dinosaur kale leaves
1 avocado
juice of 1 orange
juice of 1 lemon
10 - 12 grape tomatoes, cut in half
1 tbsp hemp seed (optional)
sea salt and pepper to taste
1/2 cup of quinoa

Directions:

  1. Wash the kale throughly and place it in a salad spinner to dry it out.
  2. Cut the kale in half and remove the rib or stem. Stack the kale leaves in a pile and roll it like a cigar, then cut it into shreds or chiffonade.
  3. Squeeze the juice of 1 lemon and 1 orange.
  4. Cut the grape tomatoes in half and set it aside.
  5. Cut the avocado in half and remove the pit, reserve the other half for the salad dressing. Cube the other half by slicing it lengthwise then crosswise.
  6. Pour the lemon, orange, salt, pepper and the other half of the avocado in a food processor and blend until smooth and creamy.
  7. Place the kale in a large bowl then add the quinoa and the citrus avocado dressing, then toss it well until everything is well coated with the dressing.
  8. Plate it in a serving dish or a salad bowl and garnish it with the grape tomatoes and avocado.
  9. Sprinkle with some hemp seeds or any type of nuts that you prefer for texture and flavor, then serve.